For anyone who loves facebook and twitter and gets sick of using social media dashboards or flicking between screens this is for you.
Rockmelt is a new web browser that has changed the way you can use the web. View the video below for a full run down on RockMelt
Rockmelt incorporates facebook, twitter, searching, sharing, chatting all into your single web browser making all of your web activity available at your fingertips
How Does it Work?
Rockmelt works like a normal web browser but requires you to have a facebook page and requires you to log in to Rockmelt via your facebook login. This does mean that you have to allow Rockmelt as an application on facebook.
Download Rockmelt Now!
To download Rockmelt click on download file below Once you have installed Rockmelt simply log in using your facebook login and allow Rockmelt access and you are all set with your new social networking browser. If you need instructions on installation please comment and we can upload instructions.
This tool is fantastic for anyone who is studying or writing reports with references in them.
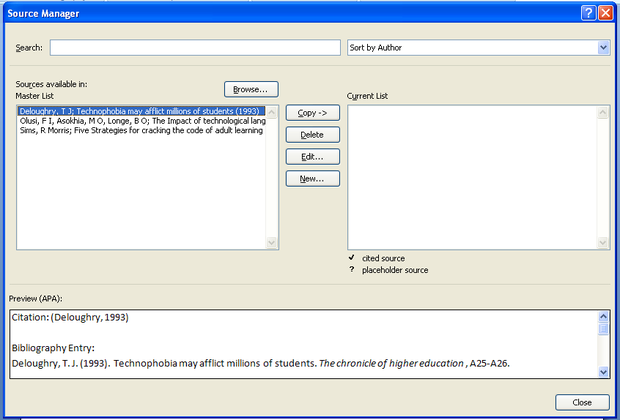
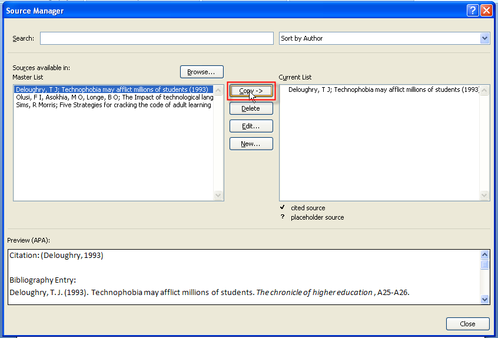
Click on the Reference tab on the ribbon. The best way to use this tool is to enter your references as you go. To add a reference click on Manage Sources, The dialog box below will display. You will notice the list of references that are already stored on my computer in the left hand box. This is a great resource of all the journals, books and articles that you have referenced in the past.
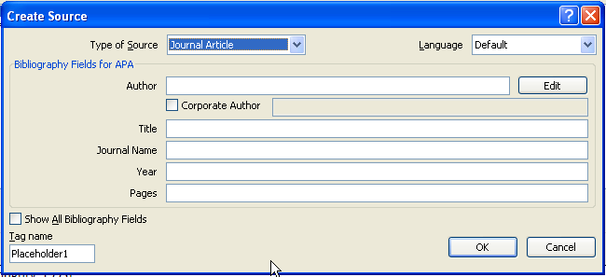
To create a new reference click on New, the dialog box below will display. Select your type of source. (this is important as it changes the options you need to fill in)
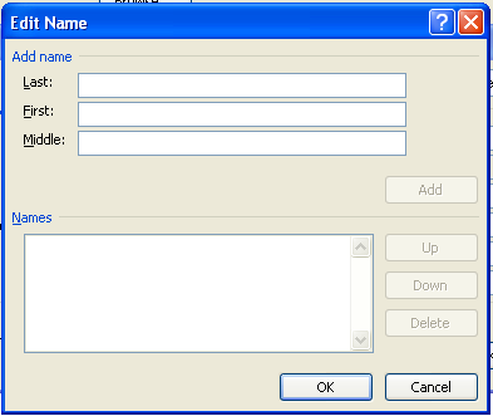
Click on Edit next to Author the box below will display
Enter the Authors Last, First and Middle name, Click Add.
If you wish to add another author, type in the names again and click Add, when you have finished click on OK
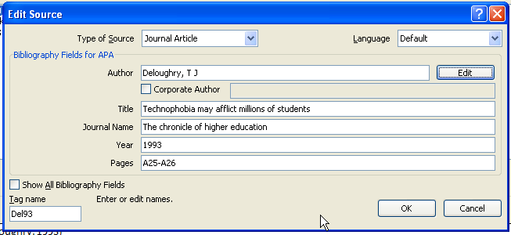
Fill in the rest of the information as shown below Once you have filled in all of the required information click on Ok
You will need to make sure that the reference is listed under the current references If the reference is not on the current list, click on the reference and click copy => this will transfer the reference into the current list. 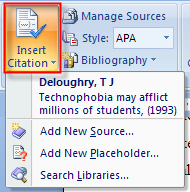 To insert and in text citation click on Insert Citation and a list similar to the one on the right will appear with a list of all your current references.
Click on the reference you wish to insert and it will be placed where your cursor is.
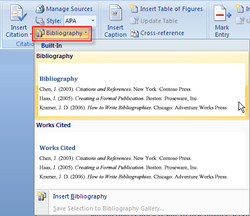 Once you have completed your Report and want to insert a bibliography simply create a new page at the end of the document and click on bibliography. This will automatically create a bibliography at the end of your report that can be updated.
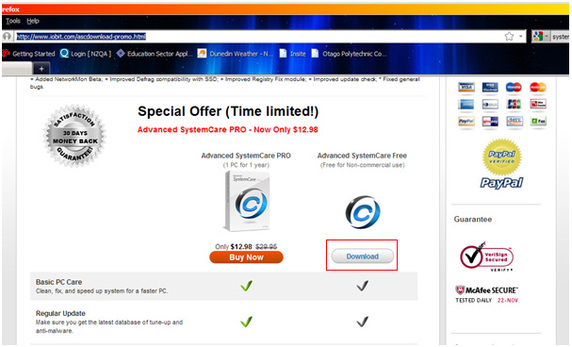
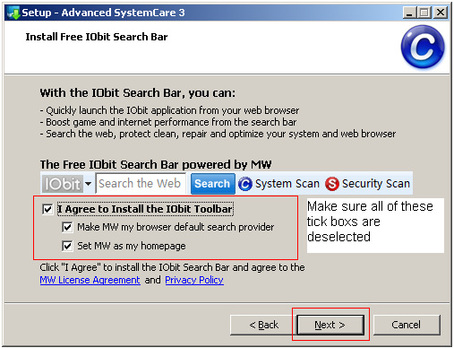
Most people know about defragmenting their hard drives. However the Windows Registry File also needs to defragmented.What is the Registry? The Registry is a database that Windows uses to store all of its configuration settings and user data. Because Windows reads and writes to this file all the time it is a good idea to make sure that it is as compact as possible.We are going to use a free tool called Advanced SystemCare Free. Go to the following webpage: http://www.iobit.com/ascdownload-promo.htmlClick on Download Download and install the software. You will be prompted though a series of screens. When you get to this one however:
Untick – I agree to Install the IOrbit Toolbar – this is an extra feature you do not need.
System care will install and run. You’ll be prompted.
The next screen will ask you if you want to upgrade to the professional version – close this screen.
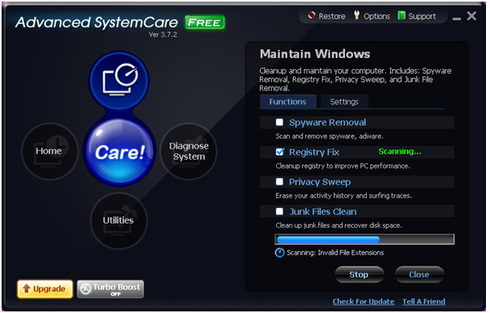
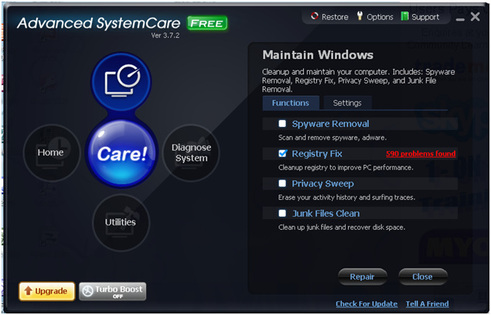
From the main SystemCare screen, choose Maintain Windows and untick everything except Registry Fix. Click on Scan.
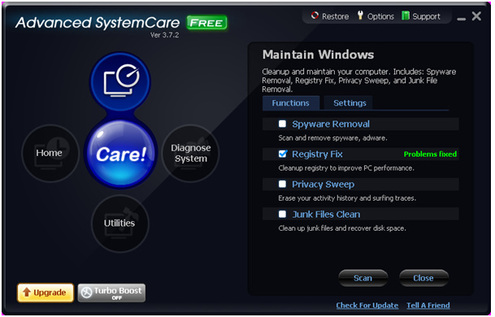
SystemCare will report the number of errors found. Click on the Repair button.
If you are a Facebook user, you will want to read this.
We all have used applications on facebook, be it games like Farmville or Texas Hold'em poker. But what is this application collecting about you once you start using it?
Most if not all of these applications are third party apps that are created by external companies to facebook itself.
What do they do?
Aside from providing you with entertainment these applications are collecting your personal information to sell to other companies marketing firms. Often this information is not made clear before we allow the application to work within our profile. So taking the time to read the terms of the application will allow you to be fully aware of what the application may be collecting from your profile.
Can i remove applications from accessing my information?
You do in fact have the power to remove and customise applications from you profile. However this will stop you from being able to play or use the application in the future in some cases.
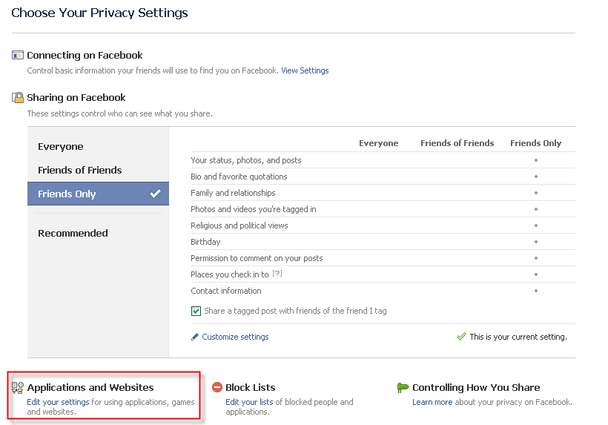
 Click on Account and Privacy settings
You will see the Applications and Websites section at the bottom left, Click on Edit your settings
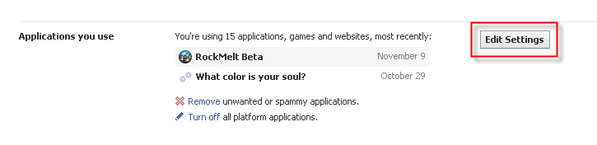
Click on Edit Settings
A list of current applications that you have allowed access will display as shown below
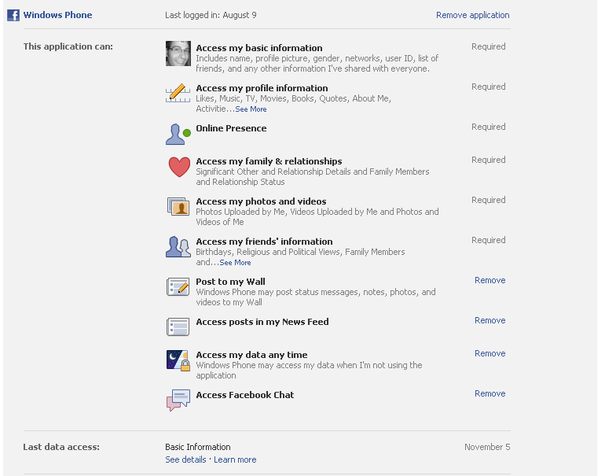
To see what the application has access to click on Edit Settings.
As you can see below the Facebook Windows Phone app has the access to a lot of what goes on with my facebook profile. You will see some things are required for you to run the app, but others you can remove. To remove certain aspects click on the Remove button beside the action. To remove the application all together (this will stop you from using the app) click on Remove application at the top right.
All Applications collect different types of data and information so it is important to check regularly and remove applications you no longer use and edit the ones you do use.
What is Internet Backup?
Backup is an important element of any computer user's computing experience, and internet backup is an exciting new part of this activity. Traditionally backup involved the use of physical media such as floppy disks, CD-Rs or ZIP disks. However, it is now possible to backup your data through the internet without ever having to touch a disk. This is a very exciting and powerful form of backup that can make your backup process go much easier and smoother.
Never Have to Find a Disk Again With Internet Backup
When you backup your files through the internet, you never have to bother with finding a disk which holds your data on it again. Your data is always right there on the internet, ready to be accessed whenever you desire. You can access your data from any computer in the world with an internet connection.
When you backup your files on the internet, you are storing them on an online server which is separate from your computer. It works essentially as an internet drive which you can always reach through the internet. All you need to do is go to the internet address where your online drive is found, log in with your username and password and you can access all of the files that you have backed up through the internet.
Because of the fact that it is on the internet, you have almost unlimited possibilities with your backup storage. While physical media such as floppy disks or CD-ROMs are limited in how much they can store, an internet backup drive is essentially unlimited in how much data it can hold, as it can be powered by a number of servers each of which can hold great amounts of data. If you have a lot of data to backup, this can be an excellent resource for you.
How Can I Get an Internet Backup Drive?
In order to get your own internet backup drive, you will need to purchase storage services from some company, such as X-Drive found at www.x-drive.com. There are many different internet backup services available online, and they are not difficult to find. Simply type in internet backup into an internet search engine and you will find a myriad of results.
Depending upon which company you work with, and how large of an online drive you want for your storage will determine the price. X-Drive, the company mentioned above, offers a 5 GB online storage drive which costs only 10 dollars a month. They even offer a free 15 day trial, so you can try out their service and make sure that it fits your online backup needs.
Once you have found the company you think is best for you, all you must do is register with their web site, and be given or choose a username and password. Then, wherever you are, you can log onto their web site and access all of the online files that you need. This is a very powerful form of backup.
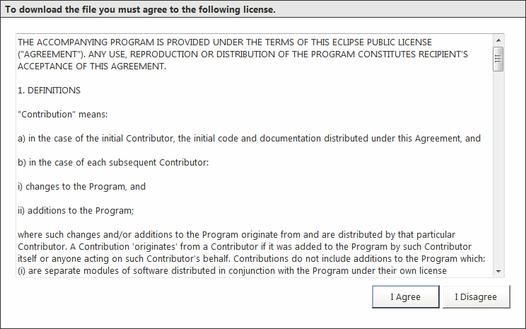
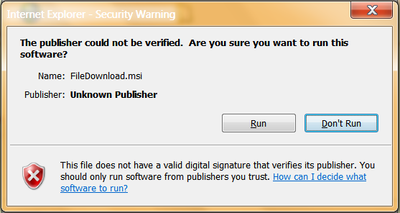
This tool is a great download for anyone who wants to quickly resize their photos to send or upload to the web. The instructions below will show you how to download this tool for your windows 7 & vista computer. Download InstructionsClick on this link: http://imageresizer.codeplex.com/releases/view/51338#DownloadId=152077 Under the Downloads heading click on the option best suited to your computer, 32 bit or 64 bitOnce you have selected your download the agreement below will display, click on I Agree. The Run dialog box will open click on Run
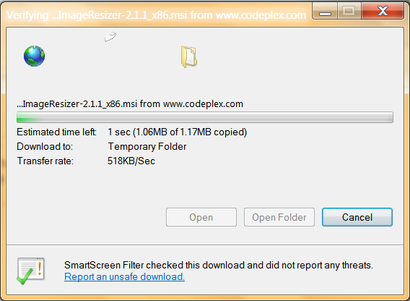
the dialog box below will display this is saving the executable file to the computer. When finished click open
To run the executable file click on Run
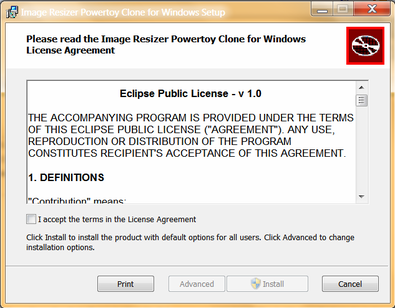
The Install wizard will open, Tick the I accept box and click Install
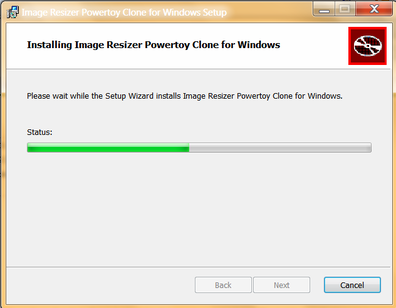
The installer progress bar will display below
Click on Finish
You have now Downloaded the power resizer tool
How to use the tool?
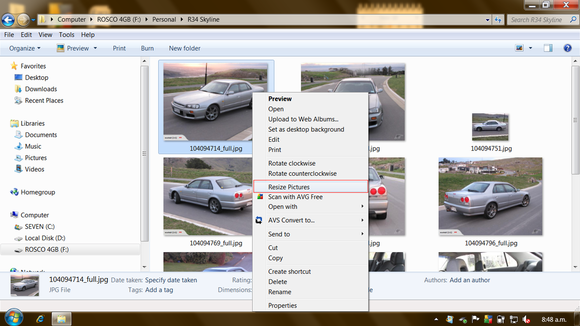
Find your picture you want to resize
Right click on the picture and click on Resize Picture
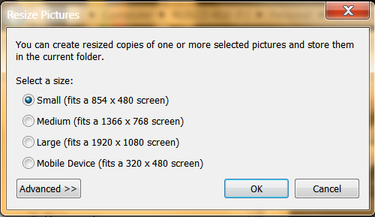
The option box below will display, choose the size you want and click ok
The progress bar will appear
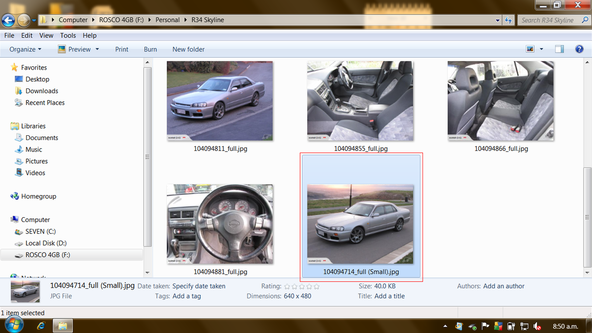
Below is how the resized image will appear, notice how it has "Small" in the file name.
The General Shortcuts We’ll kickoff the list with some really general shortcuts that you often used. - CTRL+C (Copy)
- CTRL+X (Cut)
- CTRL+V (Paste)
- CTRL+Z (Undo)
- DELETE (Delete)
- SHIFT+DELETE (Delete the selected item permanently without placing the item in the Recycle Bin)
- CTRL while dragging an item (Copy the selected item)
- CTRL+SHIFT while dragging an item (Create a shortcut to the selected item)
- F2 key (Rename the selected item)
- CTRL+RIGHT ARROW (Move the insertion point to the beginning of the next word)
- CTRL+LEFT ARROW (Move the insertion point to the beginning of the previous word)
- CTRL+DOWN ARROW (Move the insertion point to the beginning of the next paragraph)
- CTRL+UP ARROW (Move the insertion point to the beginning of the previous paragraph)
- CTRL+SHIFT with any of the arrow keys (Highlight a block of text)
- SHIFT with any of the arrow keys (Select more than one item in a window or on the desktop, or select text in a document)
- CTRL+A (Select all)
- F3 key (Search for a file or a folder)
- ALT+ENTER (View the properties for the selected item)
- ALT+F4 (Close the active item, or quit the active program)
- ALT+ENTER (Display the properties of the selected object)
- ALT+SPACEBAR (Open the shortcut menu for the active window)
- CTRL+F4 (Close the active document in programs that enable you to have multiple documents open simultaneously)
- ALT+TAB (Switch between the open items)
- ALT+ESC (Cycle through items in the order that they had been opened)
- F6 key (Cycle through the screen elements in a window or on the desktop)
- F4 key (Display the Address bar list in My Computer or Windows Explorer)
- SHIFT+F10 (Display the shortcut menu for the selected item)
- ALT+SPACEBAR (Display the System menu for the active window)
- CTRL+ESC (Display the Start menu)
- ALT+Underlined letter in a menu name (Display the corresponding menu)
- Underlined letter in a command name on an open menu (Perform the corresponding command)
- F10 key (Activate the menu bar in the active program)
- RIGHT ARROW (Open the next menu to the right, or open a submenu)
- LEFT ARROW (Open the next menu to the left, or close a submenu)
- F5 key (Update the active window)
- BACKSPACE (View the folder one level up in My Computer or Windows Explorer)
- ESC (Cancel the current task)
- SHIFT when you insert a CD-ROM into the CD-ROM drive (Prevent the CD-ROM from automatically playing)
Dialog Box Keyboard Shortcuts - CTRL+TAB (Move forward through the tabs)
- CTRL+SHIFT+TAB (Move backward through the tabs)
- TAB (Move forward through the options)
- SHIFT+TAB (Move backward through the options)
- ALT+Underlined letter (Perform the corresponding command or select the corresponding option)
- ENTER (Perform the command for the active option or button)
- SPACEBAR (Select or clear the check box if the active option is a check box)
- Arrow keys (Select a button if the active option is a group of option buttons)
- F1 key (Display Help)
- F4 key (Display the items in the active list)
- BACKSPACE (Open a folder one level up if a folder is selected in the Save As or Open dialog box)
Microsoft Natural Keyboard Shortcuts - Windows Logo (Display or hide the Start menu)
- Windows Logo+BREAK (Display the System Properties dialog box)
- Windows Logo+D (Display the desktop)
- Windows Logo+M (Minimize all of the windows)
- Windows Logo+SHIFT+M (Restore the minimized windows)
- Windows Logo+E (Open My Computer)
- Windows Logo+F (Search for a file or a folder)
- CTRL+Windows Logo+F (Search for computers)
- Windows Logo+F1 (Display Windows Help)
- Windows Logo+ L (Lock the keyboard)
- Windows Logo+R (Open the Run dialog box)
- Windows Logo+U (Open Utility Manager)
Accessibility Keyboard Shortcuts - Right SHIFT for eight seconds (Switch FilterKeys either on or off)
- Left ALT+left SHIFT+PRINT SCREEN (Switch High Contrast either on or off)
- Left ALT+left SHIFT+NUM LOCK (Switch the MouseKeys either on or off)
- SHIFT five times (Switch the StickyKeys either on or off)
- NUM LOCK for five seconds (Switch the ToggleKeys either on or off)
- Windows Logo +U (Open Utility Manager)
Windows Explorer Keyboard Shortcuts - END (Display the bottom of the active window)
- HOME (Display the top of the active window)
- NUM LOCK+Asterisk sign (*) (Display all of the subfolders that are under the selected folder)
- NUM LOCK+Plus sign (+) (Display the contents of the selected folder)
- NUM LOCK+Minus sign (-) (Collapse the selected folder)
- LEFT ARROW (Collapse the current selection if it is expanded, or select the parent folder)
- RIGHT ARROW (Display the current selection if it is collapsed, or select the first subfolder)
Shortcut Keys for Character Map - After you double-click a character on the grid of characters, you can move through the grid by using the keyboard shortcuts:
- RIGHT ARROW (Move to the right or to the beginning of the next line)
- LEFT ARROW (Move to the left or to the end of the previous line)
- UP ARROW (Move up one row)
- DOWN ARROW (Move down one row)
- PAGE UP (Move up one screen at a time)
- PAGE DOWN (Move down one screen at a time)
- HOME (Move to the beginning of the line)
- END (Move to the end of the line)
- CTRL+HOME (Move to the first character)
- CTRL+END (Move to the last character)
- SPACEBAR (Switch between Enlarged and Nor mal mode when a character is selected)
Microsoft Management Console (MMC) Main Window Keyboard Shortcuts - CTRL+O (Open a saved console)
- CTRL+N (Open a new console)
- CTRL+S (Save the open console)
- CTRL+M (Add or remove a console item)
- CTRL+W (Open a new window)
- F5 key (Update the content of all console windows)
- ALT+SPACEBAR (Display the MMC window menu)
- ALT+F4 (Close the console)
- ALT+A (Display the Action menu)
- ALT+V (Display the View menu)
- ALT+F (Display the File menu)
- ALT+O (Display the Favorites menu)
MMC Console Window Keyboard Shortcuts - CTRL+P (Print the current page or active pane)
- ALT+Minus sign (-) (Display the window menu for the active console window)
- SHIFT+F10 (Display the Action shortcut menu for the selected item)
- F1 key (Open the Help topic, if any, for the selected item)
- F5 key (Update the content of all console windows)
- CTRL+F10 (Maximize the active console window)
- CTRL+F5 (Restore the active console window)
- ALT+ENTER (Display the Properties dialog box, if any, for the selected item)
- F2 key (Rename the selected item)
- CTRL+F4 (Close the active console window. When a console has only one console window, this shortcut closes the console)
Remote Desktop Connection Navigation - CTRL+ALT+END (Open the m*cro$oft Windows NT Security dialog box)
- ALT+PAGE UP (Switch between programs from left to right)
- ALT+PAGE DOWN (Switch between programs from right to left)
- ALT+INSERT (Cycle through the programs in most recently used order)
- ALT+HOME (Display the Start menu)
- CTRL+ALT+BREAK (Switch the client computer between a window and a full screen)
- ALT+DELETE (Display the Windows menu)
- CTRL+ALT+Minus sign (-) (Place a snapshot of the active window in the client on the Terminal server clipboard and provide the same functionality as pressingPRINT SCREEN on a local computer.)
- CTRL+ALT+Plus sign (+) (Place a snapshot of the entire client window area on the Terminal server clipboard and provide the same functionality as pressing ALT+PRINT SCREEN on a local computer.)
Internet Explorer navigation - CTRL+B (Open the Organize Favorites dialog box)
- CTRL+E (Open the Search bar)
- CTRL+F (Start the Find utility)
- CTRL+H (Open the History bar)
- CTRL+I (Open the Favorites bar)
- CTRL+L (Open the Open dialog box)
- CTRL+N (Start another instance of the browser with the same Web address)
- CTRL+O (Open the Open dialog box, the same as CTRL+L)
- CTRL+P (Open the Print dialog box)
- CTRL+R (Update the current Web page)
- CTRL+W (Close the current window)
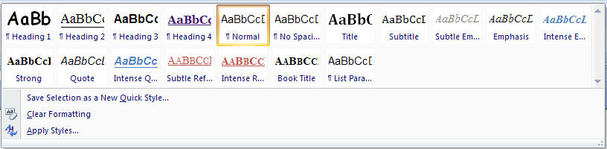
Using styles is a great time saver for formatting text and headings in your documents. If you are intending on using a table of contents then you will need to use styles for your headings and sub headings. You will find your style options on the home tab under styles.
To expand your style options click on the drop down button on the right hand side of the style selection box.
For the main headings in your document, select Heading 1
For the sub headings in your document, select Heading 2
Highlight or select the text that you wish to apply the heading to and click on the Heading style. You will notice your text changes to the format of the heading.
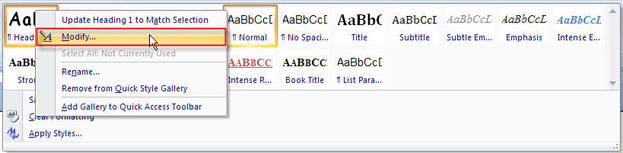
Modifying Heading Styles
To change the styles formats we must modify each heading style what we are using.
To modify a style right click on the style and click modify.
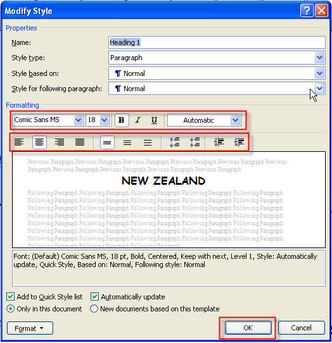 The display box to the right will display, you can change all font options and alignment options to customise the heading to your specification. Once you have changed the heading styles, click on the Ok button.
You can modify all of your heading styles individually to suit the needs of your documents once you have applied the heading style to your document you can then using the contents page function.
A table of contents is essential for lengthy documents like annual reports, books, and other types of documents. Fortunately, creating a table of contents in Microsoft Word 2007 is quite easy. With a few clicks of your mouse, you can insert a formatted table of contents in your document. And, adding entries to your table of contents is as easy as clicking a button.
Before creating your table of contents you must ensure that you are using styles for your headings in your document. For example, main heading would have style Heading 1, sub headings would be style Heading 2. Click on the Microsoft Word category for instructions on using styles.
 Word 2007 provides different options for inserting a table of contents in a document. First, you can opt to insert a pre-formatted table of contents. Or, you can insert a customized table of contents in your document.
Decide whether you want to customize the formatting of the table of contents before you insert it in your document.
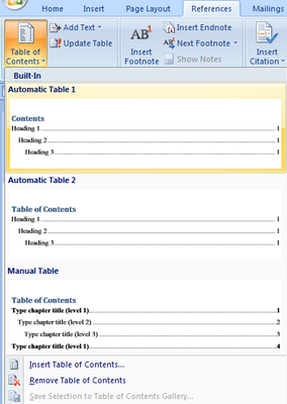
To insert a pre-formatted table of contents, position your cursor where you would like to insert the table in your document. Open the References ribbon. In the Table of Contents section, click Table of Contents. In the dropdown box that appears, select Automatic Table 1 or Automatic Table 2.
 To insert a customized table of contents in Microsoft Word, position your cursor where you would like to insert the table in your document.
Open the References ribbon and click Table of Contents in the Table of Contents section. In the dropdown box that appears, select Insert Table of Contents.
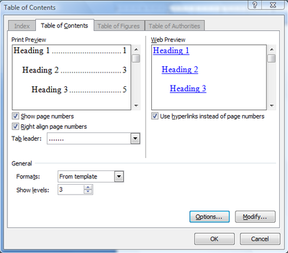
The Table of Contents dialog box opens. You can specify whether page numbers are shown and how they're aligned. You can also specify how the tab leader line appears. Or, use the Formats box to select a formatting style for your table of contents.
Word will automatically pull entries for your table of contents from the document. But, you have several different options for marking table of contents entries. Keep reading for details.
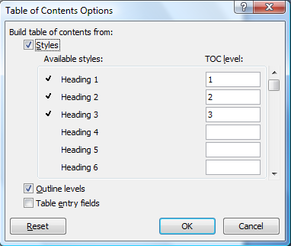 You have different options for marking your table of contents entries in Word 2007. In the Table of Contents box, click Options. The Table of Contents Options box opens.
If you're working from an outline, select Outline levels.
You can also build your table of contents from styles. Select Styles in the Table of Contents Options box. Then, use the Available styles box to specify the styles that you will use to mark table of contents entries. Just enter the table of contents level for a style in the TOC level column.
Finally, you can mark table of contents entries manually. Just select Table of entry fields in the Table of Contents Options box.
Note: If you choose, you can use a combination of some or all of these marking options.
Once you've specified your table of contents options, click OK. Then, click OK in the Table of Contents box to close it. Your table of contents will appear in your document.
 Word will automatically build your table of contents based on your selections.
If you selected the option to mark table of content entries manually, you can mark entries easily. Just select the text you would like to mark. Then, press Alt+Shift+O. The text will be included in your table of contents.
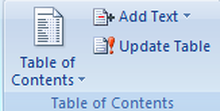
After marking an entry, you may want to update your table of contents. Open the References tab. In the Table of Contents section, click Update Table.
The NOW function, one of Excel's date and time functions, is used to add the current time and date to a spreadsheet.
The syntax for the NOW function is:
= NOW ( )
 - Click on cell D1 - the location where the results will be displayed.
- Click on the Formulas tab.
- Choose Date & Time from the ribbon to open the function drop down list.
- Click on NOW in the list to bring up the function's dialog box.
- Click OK.
- The current time and date should appear in cell D1.
- When you click on cell D1 the complete function = NOW ( ) appears in the formula bar above the worksheet.
- If you want cell D1 to show only the current time or date, change the cell's format to show either time or date only.
|


 RSS Feed