Using features in Microsoft Office PowerPoint 2010 we can now at the click of one button convert our PowerPoint presentations into Video files so they can be played anywhere.

Step 1.

Open your PowerPoint file in 2010

Step 2.

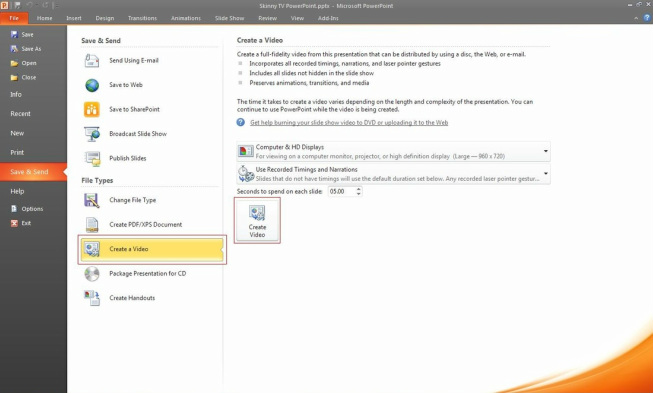
Click on the file button and click on Save & Send
You will see the screen below
Picture
Step 3.

Click on Create a Video

Step 4.

Select the seconds spent in between slides and click Create Video

This will take some time depending on your computer specifications and the size of the PowerPoint.

When complete you will have a Video file of your PowerPoint that can be played on most media players.

 
Microsoft Windows Vista and Windows 7 has a Windows Search Indexing service installed and enabled that allows the operating system to search certain places quickly finding files or programs in a flash. In order to search certain locations on your computer quickly the Windows Search indexing service indexes the contents of each location in advance and stores them in memory to speed up it’s search. This can take up a lot of memory and resources and will certainly affect your computers performance. It might even be indexing locations that you never even intend to search for files on. This is why you need to either disable theWindows Search indexing service or modify its process to do minimal work.

Of course you do not need to alter any settings for the Windows Search indexing service if you have not recognized any performance problems on your computer. However if you want to speed up your computer, this is just one of the tasks you can do.

How to disable the Windows Search Indexing completely for all locations:


  1. Go to the Start Menu.
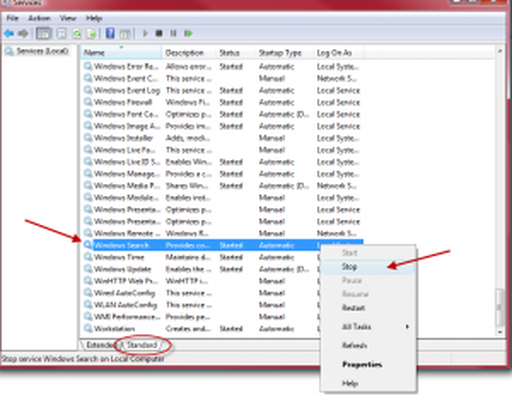
  2. Type services.msc in the search box. As you are typing you will see items appear in the menu. This is because it is being indexed and can be searched quickly.
  3. Scroll-down to find the Indexing Service which is called Windows search and double-click it.
Picture
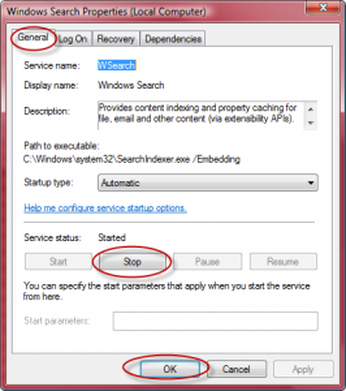
4.  Press on  the Stop button to Stop the indexing service.
Picture
5.  Under Startup type press on the drop down arrow to see choices.
Picture
6.  Choose Disabled.

After disabling and turning off the Windows Indexing Service, you will still be able to use the Windows search but it will work more slowly than with the indexing enabled.


With the recent articale on 3 News last night, it seems a good time to remind people of the pitfalls and threats that do exist in the world of Social Media. There are all kinds of people using social media sites like Facebook and Bebo to mislead others. When using social media remember these simple rules:
  • Only accept people as friends who you actually know and even better have meet in person
  • Set your security options to private to avoid non friends viewing your page
  • Treat any contact from someone you don't know as suspicious 
View the video of a Facebook predator who claimed multiple aliases to build relationships with unaware men in New Zealand.

Source 3News Website: http://www.3news.co.nz/Facebook-fake-fronts-up/tabid/309/articleID/211248/Default.aspx

 
Most computer users don't take full advantage of the computer Mouse. Below are computer mouse tips and secrets that help you get the full potential of your computer mouse and increase your overall productivity while on the computer.

Shift key and mouse click

Many text editors and programs allow you to highlight all or portions of text using the Shift key and the mouse. For example, place the cursor at the beginning of a paragraph, hold down the Shift key and click at the end of the paragraph to highlight the full paragraph.

Take full advantage of the scroll wheel

Today, everyone is fully aware of a mouse wheels ability to scroll up and down on a page. However, this wheel can also do so much more, as shown below.

  • The mouse wheel is not just a wheel, it can also be used as a button. Pressing down on the wheel will act like a third mouse button. This can be used to open a web page in a tab by clicking the wheel on any link and can also be used to close a tab by clicking the wheel on any open tab.
  • Quickly Zoom in and Out on a web page, word document, excel spreadsheet, etc. by holding down the Ctrl key and scrolling up to zoom in and down to zoom out.
  • Move forward and backwards while browsing the Internet by holding down the Shift key and scrolling up and down. Scrolling down goes back and scrolling up goes forward.
Select with double and triple click

Any word can be easily selected by double-clicking the word. If you want to highlight the whole paragraph, click the mouse button three times on any text in the paragraph.

Use the right-click

Take full advantage of the right-click any time you highlight text or wish to view the properties of an object. For example, if you highlight a file or text, you can right-click that highlighted item copy it and then right-click anywhere else to paste it.

 If you right-click on any file or text and drag it while continuing to hold the right button, when you let go you will be given the option to move or copy that file or text. This saves you the extra step of having to right-click where you want to paste the item.

 While in a browser pressing and holding Ctrl while clicking on any link will open that link in a new tab.

Ctrl key and mouse click or highlight

While holding down the Ctrl key you can left-click to select multiple objects or highlight multiple sections of text. For example, in Microsoft Windows you could hold down the Ctrl key and click to select multiple files at once. If you wanted to highlight different parts of a paragraph or web page, you could also hold down the Ctrl key and select each section you wanted to copy.

 Mozilla Firefox users can also hold down the Ctrl key and individually click on each cell in a table they wish to copy or drag their mouse down a row to select just that row or text without selecting any of the other text in that table.

Use the mouse side buttons

Many new computer mice have buttons on the side of the mouse. These buttons can be programmed to do anything, however, by default the left-thumb button can be used to go back on a web page. This makes browsing the Internet more enjoyable since you do not need to move the mouse cursor to the browser back arrow button in order to go back a page.

Use the Windows Snap To feature

Take full advantage of the Windows mouse Snap To feature, which will automatically move your mouse to buttons that appear in a dialog box. For example, if you delete a file or close a window you may get a prompt asking you if you are sure you want to perform the task. With the Snap To feature enabled, the mouse cursor automatically moves to the Ok button, so all you will have to do is click the mouse button if you agree. This saves you the time of having to move the mouse cursor over to the Ok button and then click Ok. To enable this feature open the Mouse properties under the Windows Control Panel and check the Snap To check box under the Pointer Options tab.

 While changing this feature we also suggest looking at other available options in the Mouse settings. For example, increasing the Motion speed can also help increase your productivity while using the mouse.

Manage the open window with the mouse

Double-click the top title bar of any window to maximize a window or if it is already maximized resize it to a window. You can also double-click the icon for the window in the top-left corner of the window to close that window.

Move the mouse with your keyboard

Instead of using the mouse that came with your computer you can also enable Windows to use the number pad as a mouse.

Customize your mouse

Finally, if you have a mouse with more than two buttons, installing the included mouse software will allow you to customize the mouse even more. For example, if you don't use the side buttons to move back and forth in a web page change it to something you do more often, such as switching between open windows or opening the calculator.
 
Great computer security resource, free ebook. Download this ebook below. 
internetsafety.pdf
File Size: 1514 kb
File Type: pdf
Download File


Most of the virus enters the computer through USB Flash drives, when we open the drive through autoplay the viru is a simple tip with which you can stop autoplay in USB Flash drives. Not only flash drives, it also stops autoplay for CD and DVD also.

While inserting CD, DVD or any flash drive, simply press and hold the Shift key, this will disable the autoplay dialog box. Holding down the Shift key will also block the applications that starts automatically.

Works fine in Windows XP and Windows Vista, Just give it a try and drop your comments.

 
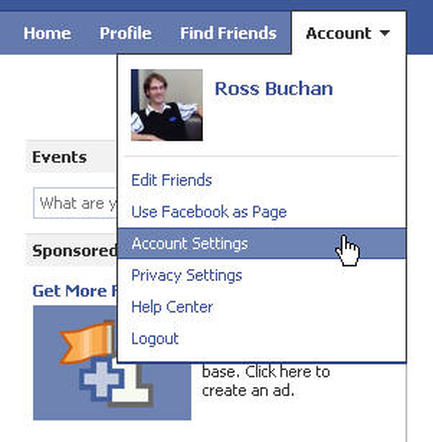
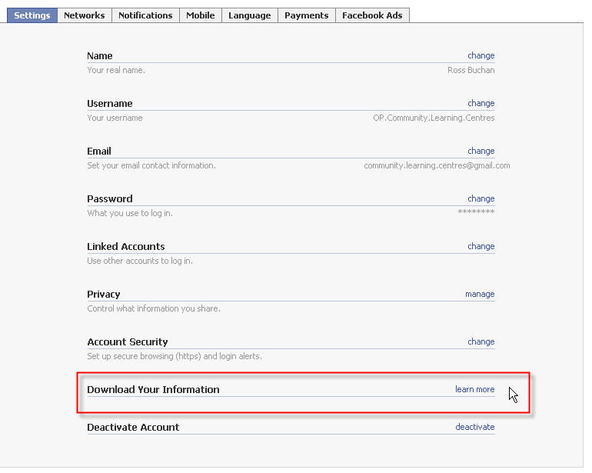
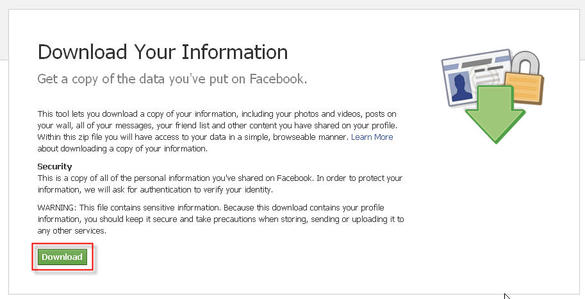
You can now download a history of all your Facebook activity and data, so you can see what facebook has a record of.

Click on Account and select account settings.
Picture
Find Download Your Information and click on learn more.
Picture
Click on Download, this will download all of your activity on Facebook and show you what facebook knows about you. 
Picture
You will be emailed when the information is ready to be viewed. The email will direct you where to go. 

 
Everyone these days is downloading, watching, and sharing videos from video-sharing sites like YouTubeGoogle VideoMetaCafe,DailyMotionVeohBreak, and a ton of other similar sites. Whether you want to watch the video on your iPod while working out, insert it into a PowerPoint presentation to add some spice, or simply download a video before it’s removed, it’s quite essential to know how to download,convert, and play these videos.

Free Web services for downloading videos from video-sharing sites
Picture
ClipNabber allows you to download videos from YouTube, Metacafe, etc by simply copying and pasting the URL. You’ll then get a link whereby you can download the file to your computer, iPod, iPhone, or any other media player. You’ll need to have an FLV player for the YouTube videos. Quick and very easy to use!
Picture
Zamzar is a free online file conversion web application that can not only convert videos off the Internet to AVI, MPEG, 3GP, MP4, MOV, etc, but also converts between audio, image, and document formats. Paste the URL into Step 1 and then convert the file to your favorite format.
Picture
VideoDownloader is a FireFox extension, but also allows you to paste in any URL from many sites such as Blip.TV, iFilm, and even social networking sites like MySpace. You can also download a free FLV player from their site to play the videos.
Picture
Vixy.net is another site that not only downloads online videos, but will also convert them AVI, MOV, MP4, 3GP, or MP3 (if you want to extract the audio from the file). Using this site, you don’t have to worry about downloading a FLV player as you can convert it to Windows format. (Same as Zamzar)
Picture
KeepVid also supports just about any video sharing site out there and the only difference about this site is that it also has a Top Videos section, so you can quickly download the most watched videos around the web.
Picture
Media Converter is similar to ZamZar and vixy.net, but requires you to create an account and log in. Also, it seems like it only supports downloading and converting videos from YouTube. You can also download their video download program, but it only supports 5 sites.
Picture
Hey! Watch is an online video encoding web service that encodes video into different formats including HD very quickly. The graphical interface is very nice and there are lots of features and options, such as the ability to transfer any video from the web directly to an FTP server or to online storage.
Picture
YoutubeX, as the name suggests, allows you to download videos from YouTube.Obviously, it only supports YouTube, but it has a couple of other features, such as the ability to play your video on the site and find popular videos quickly.
Picture
VideoRonk searches across multiple video-sharing sites such as Google Video, YouTube, MetaCafe and DailyMotion to find the most popular videos on each of them. You can either watch them on VideoRonk or download them to your computer in FLV format.

Source: techpraveen.com

 
After you create a presentation or slideshow on PowerPoint 2007, you might want to take it with you to the place where you have to convey the presentation. You can easily make a PowerPoint 2007 presentation CD if you can’t carry your computer with you. If you make a PowerPoint 2007 presentation CD, you can easily distribute it to others as well. You will need a writable CD drive installed in the computer you are using. A blank CD will also be required. Put it in the CD drive before starting this procedure. Follow these steps in order to make a PowerPoint 2007 presentation CD:  

Open the PowerPoint 2007 presentation you want to transfer into a compact disk.


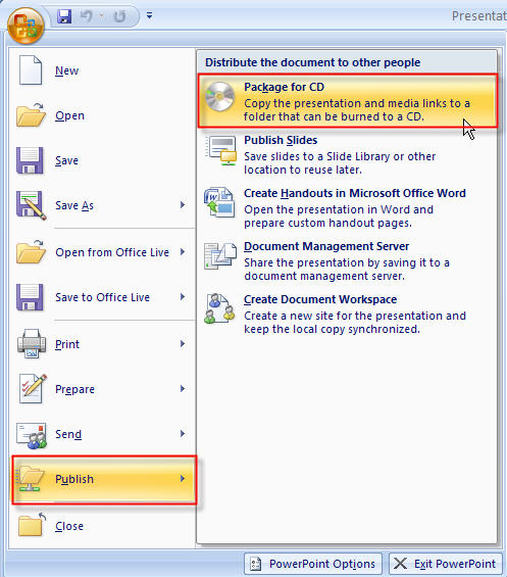
Click on the "Office" button.

Select "Publish" and click on "Package for CD" from the menu.

Picture
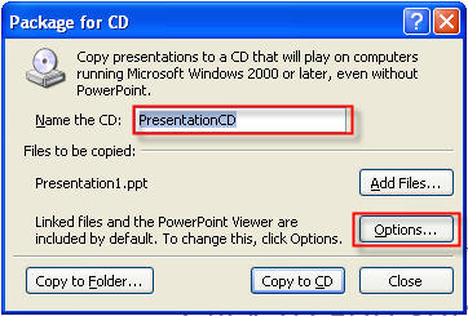
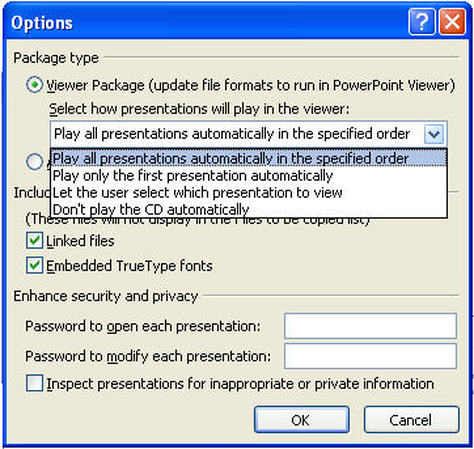
The "Package for CD" window will open. Choose the kind of package you want to use by clicking on Options. The "Viewer Package" choice contains the PowerPoint viewer. The Viewer Package choice is suitable when the person you want to give the CD to doesn’t have PowerPoint in his computer.
Picture

Select the "Embedded Truetype Fonts" checkbox on the Options menu. This will make the presentation fonts legible on a different computer.

If you have added external files, such as a narration in the presentation, then select the checkbox called "Linked files".

Picture
Click on the "OK" button.

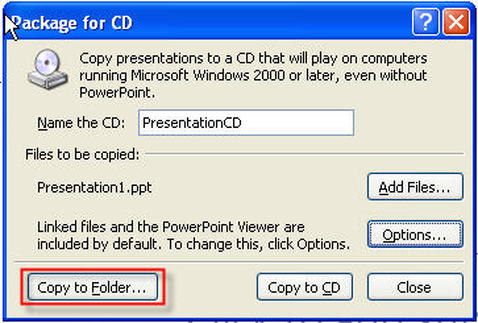
Select the "Copy to Folder" option from the “Package for CD” window. A back-up copy of the presentation will be made on the drive.

Picture
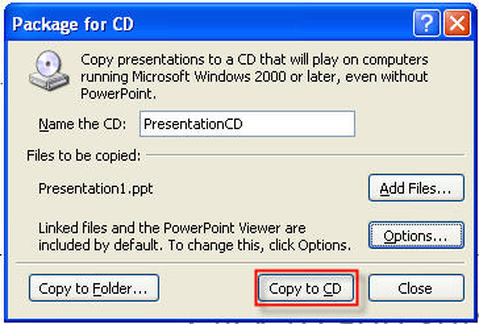
Now click on the "Copy to CD" button from the “Package for CD” window pane.
Picture
After you make a PowerPoint 2007 presentation CD, you can take it out of your computer and check if it is working on a different computer.

 
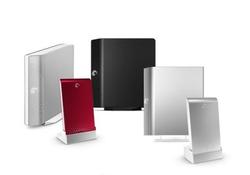
External Hard Drives have become extremely common use and are very affordable. Why should you use an external had drive and what can you use them for?
Picture

External Hard Drives come in multiple options. The first option is a portable media drives, these are smaller in size and capacity usually. The other option is the external hard drive, these are usually bigger in size and capacity. 


What can you use an external hard drive for?
  • Storing Music, Photos, Videos on. (since these files usually take up large amounts of space it is best to store them on an external hard drive).  
  • Backing up your important files. (making copies of all your important files is essential.) the smallest virus or hardware failure could result in you losing your files.
  • Storing install files from software you have downloaded from the internet

Why should you use an external hard drive?
  • Easy user friendly way to expand your storage space on your computer with  out having to get a computer tech to install a bigger hard drive into your system.
  • It is portable (even the big ones) and can be attached to any other computer.